Bonjour Forwarding
Click 日本語 for Japanese
Overview
This feature can be used to allow Bonjour to work across multiple VLANs. When you enable Bonjour forwarding, Bonjour requests from clients on this SSID will be forwarded to the VLAN you define here. You can choose specific services as well to enable Bonjour forwarding for a limited subset of services, e.g. only for AirPlay.
Configuration
To configure Bonjour forwarding, follow these steps:
-
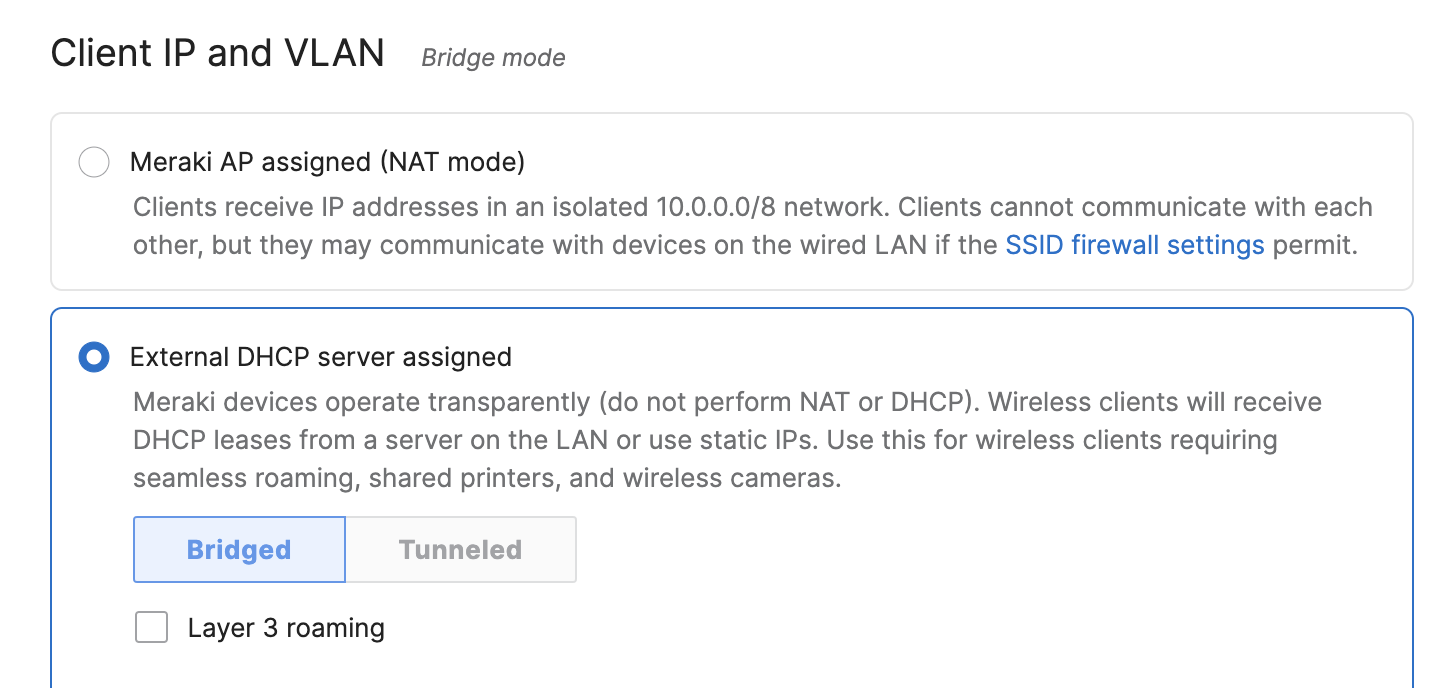
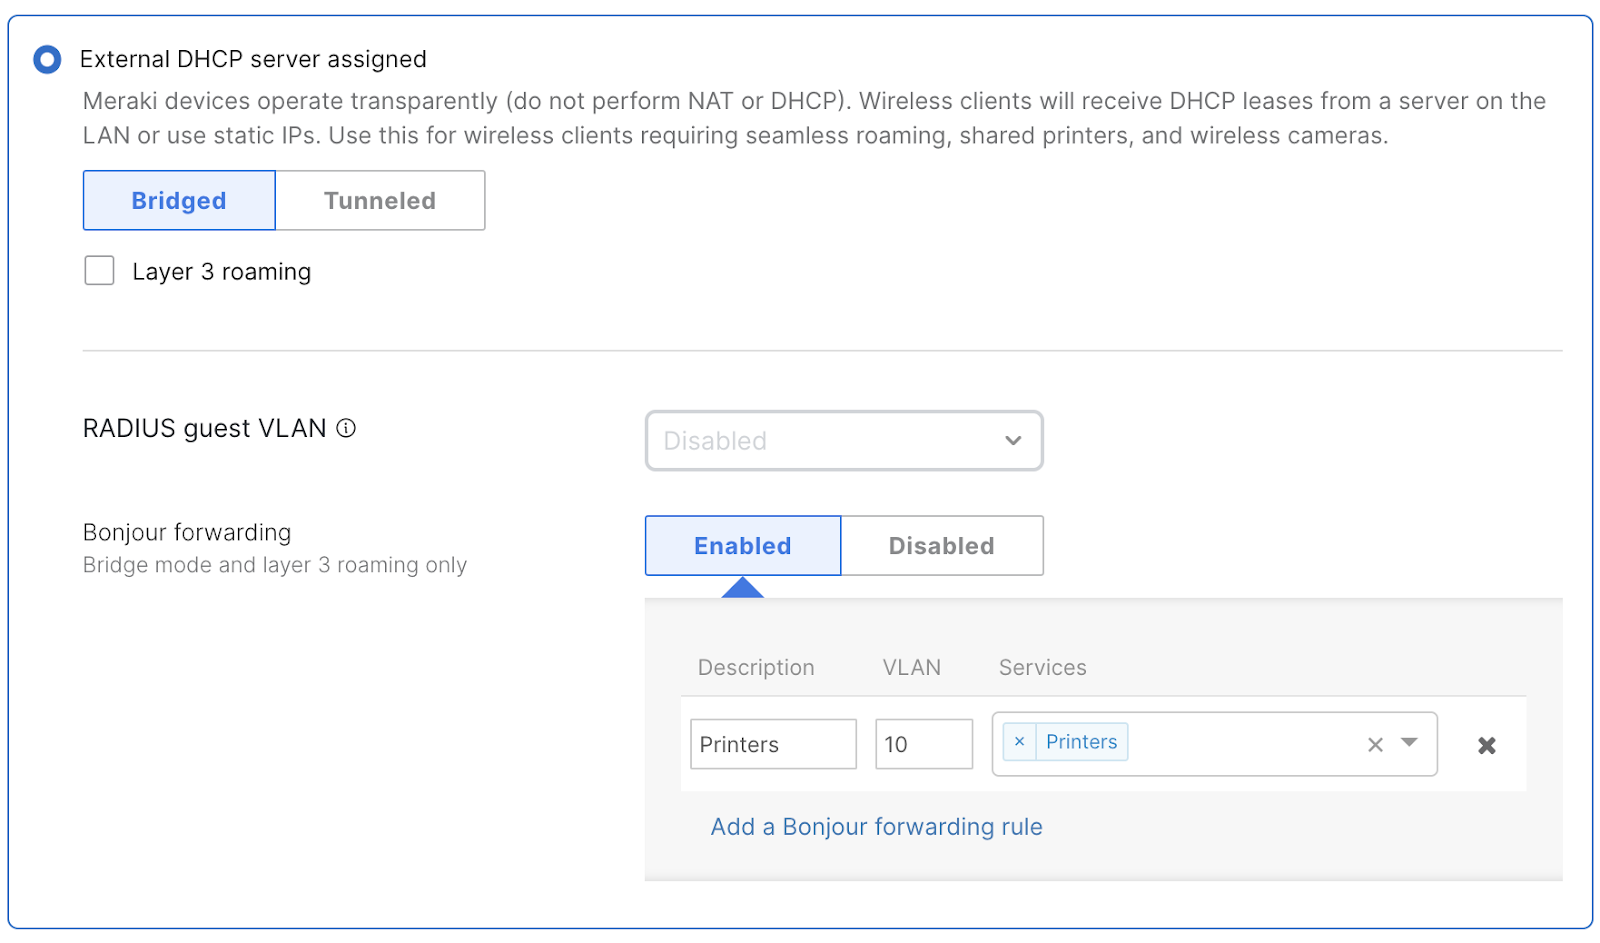
Go to the Wireless > Configure > Access control page and select the External DHCP server assigned option under the Client IP and VLAN section.
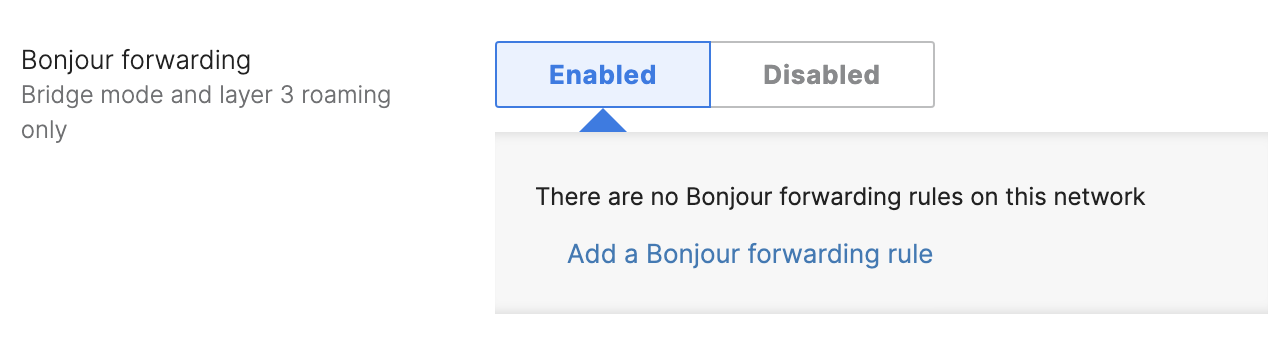
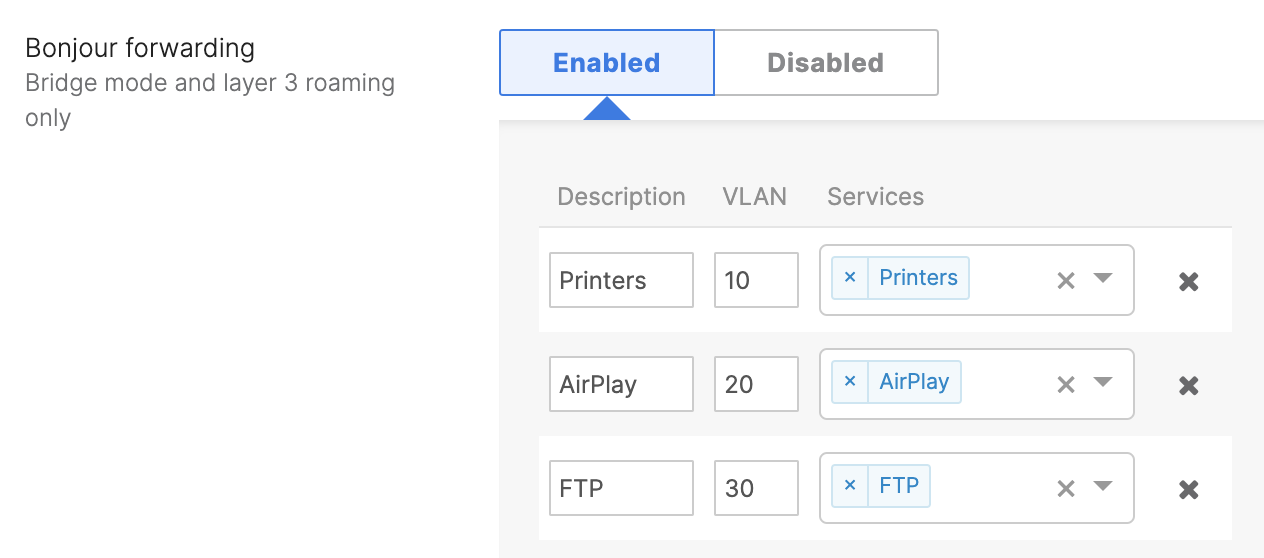
- Set Bonjour forwarding to Enabled and Click Add a Bonjour forwarding rule.
- Add a description, destination VLAN, and specific services that need to be forwarded.
- Description: Specify a name for the rule.
- VLAN: Select one VLAN where network services are running. Bonjour requests will be forwarded to these VLANs. If you want to specify multiple VLANs for one or more services, you must create multiple Bonjour forwarding rules. Please note that the service VLAN cannot be the native untagged VLAN, which is usually 1.
- Services: The list of services that can be forwarded includes:
- All services
- AirPlay
- AFP (Apple File Sharing)
- BitTorrent
- FTP
- iChat
- iTunes
- Printers
- Samba
- Scanners
- SSH
-
Save changes
New Behavior in MR 30.X+ Firmware
Overview
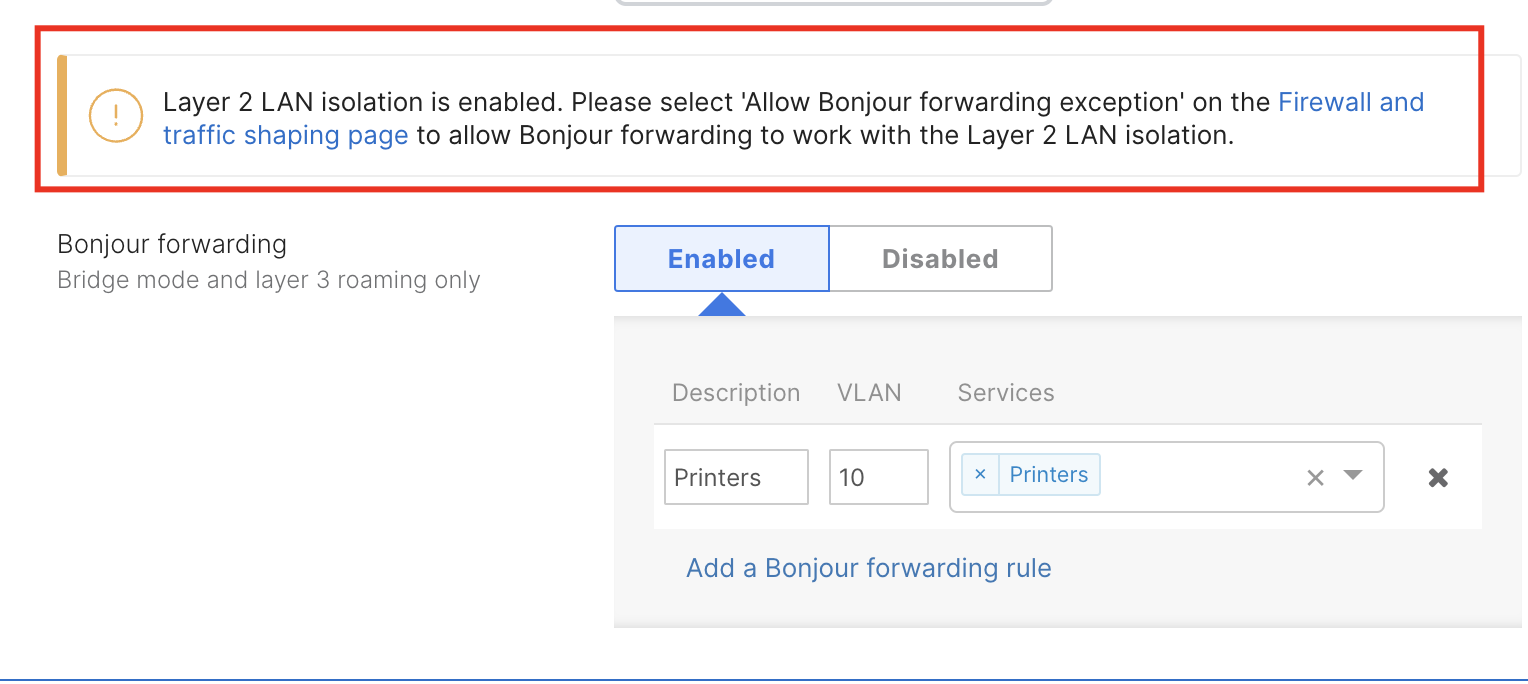
Before MR 30.X, if Layer 2 Client Isolation were enabled, it would prevent Bonjour forwarding from functioning. MR 30.X firmware allows Bonjour to function even when the Layer 2 isolation is enabled on the same SSID.
Configuration
-
Enable Bonjour forwarding on the Wireless > Configure > Access control page for the desired SSID and save changes.
2. Enable Layer 2 LAN isolation for the same SSID on the Wireless > Configure > Firewall and traffic shaping.
3. Once the Layer 2 LAN isolation is enabled, select the “Allow Bonjour forwarding exception” checkbox and save changes.
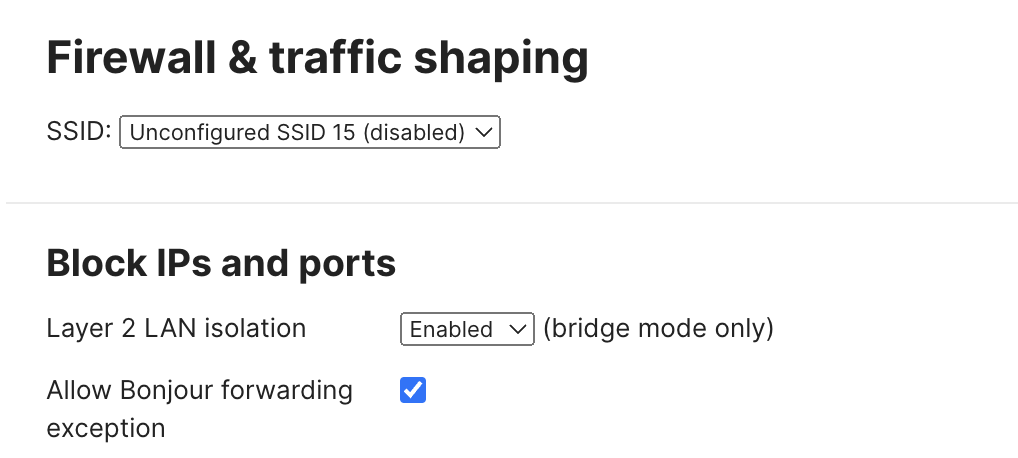
Note: The “Allow Bonjour forwarding exception” option is only available when Bonjour forwarding is enabled on the Wireless > Configure > Access control page.
If Bonjour forwarding and Layer 2 isolation (without Bonjour forwarding exception) is enabled on an SSID, you will see the following warning on the Wireless > Configure > Access control page: