
Managing Dashboard Administrators and Permissions
This article will cover the different permission levels within the dashboard and how to manage administrative users. These are the users who have access to log in to the dashboard and view/administer Cisco Meraki networks/devices. For information on how to manage users with access to join a client VPN or wireless network, please review the article on Managing User Accounts using Meraki Authentication.
Summary
There are two basic types of dashboard administrators: Organization and Network.
- Organization administrators have complete access to their organization and all its networks. This type of account is equivalent to a root or domain admin, so it is important to carefully maintain who has this level of control; see below for best practices regarding these accounts
- Network administrators have access to individual networks and their devices. These users can have complete or limited control over their network configuration, and have the ability to view organization inventory and claim devices into networks they administer. They do not have access to most organization-level information, such as licensing information.
Most dashboard administrators will fall into one of the two above categories. The remainder of this article goes in-depth about the options and limitations associated with different admin types.
Learn more with this free online training course on the Meraki Learning Hub:
Organization Permission Types
None: User will not have organization-wide access. Use this option if you want the user to have network only permissions.
Read-only: User able to access most aspects of network and organization-wide settings, but unable to make any changes.
Read-Only admins can perform switch port cycles and cable tests
Full: User has full administrative access to all networks and organization-wide settings. This is the highest level of access available.

Note: Dashboard organizations should always have at least two organization admins with full permissions. This is best practice in case one account is locked out or if access to that account's email address is lost.
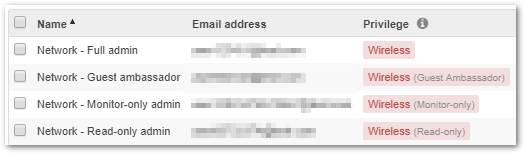
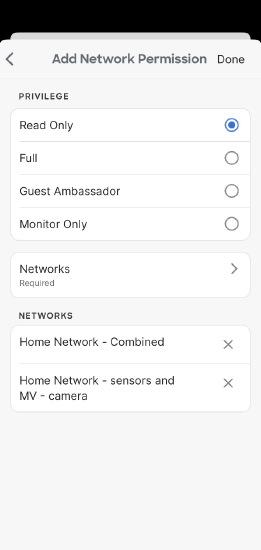
Network Permission Types
Guest ambassador: User only able to see the list of Meraki authentication users, add users, update existing users, and authorize/deauthorize users on an SSID or client VPN. Ambassadors can also remove wireless users if they are an ambassador on all networks. The existence of network templates anywhere in a dashboard organization prevents guest ambassadors from deleting wireless users.
User will only be presented with user management portal only.

This feature can used when individuals such as a receptionist or office manager may need more privileges to grant network access to a visitor without giving them full network access.
Monitor-only: User only able to view a subset of the Monitor section in the dashboard and no changes can be made.
Note: monitor-only admins can view summary reports but not schedule reports via email in the dashboard.
Read-only: User able to access most aspects of a network, including the Configure section, but no changes can be made.
Full: User has access to view all aspects of a network and make any changes to it.
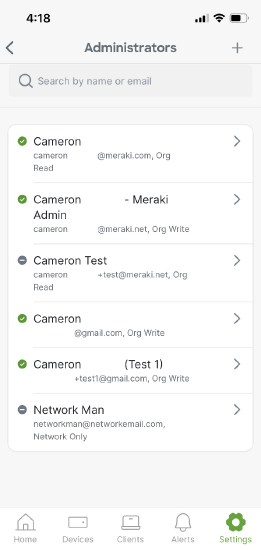
Mobile App Administrator Management
Administrator management is also available in the Meraki Mobile app (iOS) (Android). Using this tool, you can view, add, edit and delete Organization and Network administrators on the go, whenever most convenient.
Note that some administration management features are not yet available in the mobile app, including:
- SAML Admins
- Camera-only admins
- Unlocking accounts
Managing Organization Permissions
All permissions for a dashboard organization can be managed under Organization > Administrators, however, this page is only visible to users with full or read-only organization access. Changes on this page can only be made by users with full organization access.
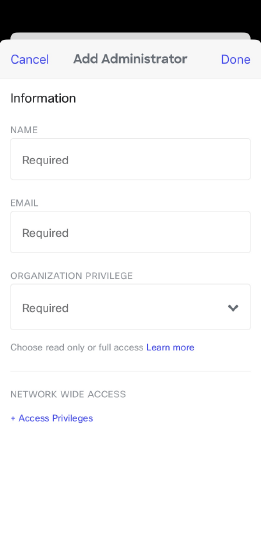
Adding an Organization Admin
Under Organization > Administrators
- Click Add admin along the right side of the page.

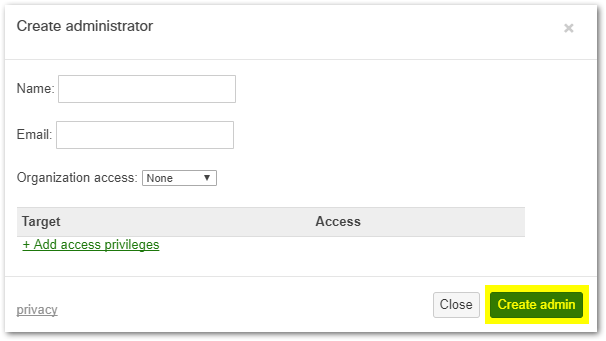
- Enter the admin's Name and the Email they will use to log in.
- Choose a level of Organization Access as defined in the Organization Permission Types section within this doc.
- Click Create admin.
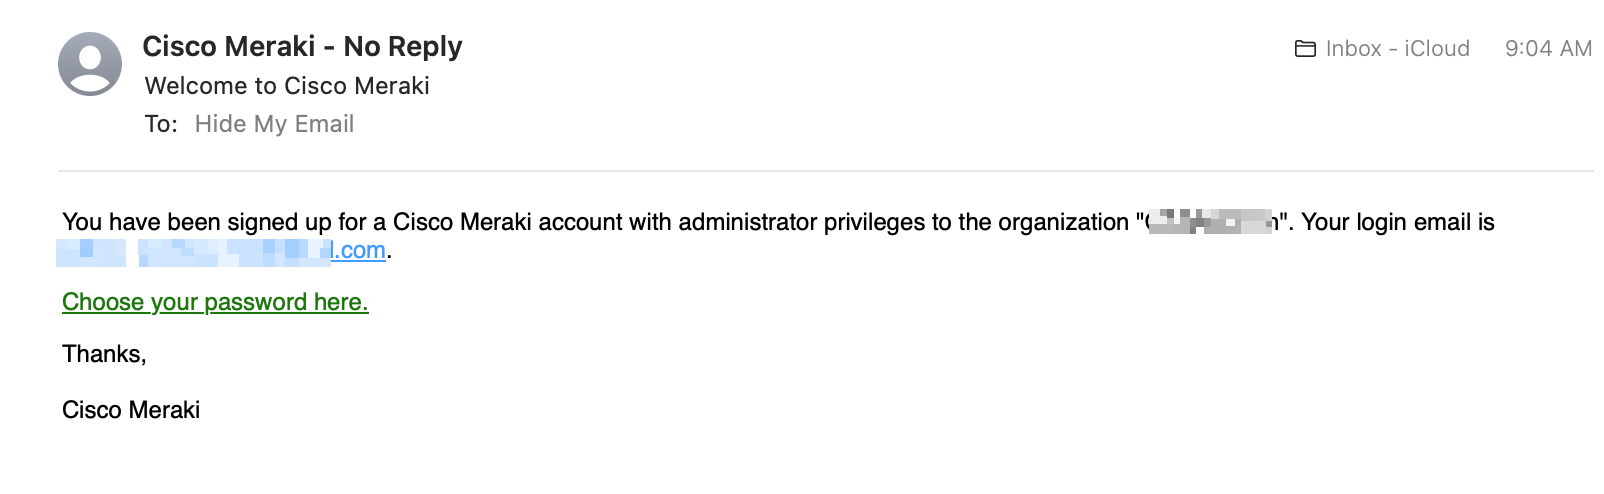
- An email from noreply@meraki.com will be sent to the email address entered with a temporary password instructing the user how to log in.
- Click Save changes.
Note: To change the admin's Name/Email after creation, see Changing a Dashboard Account's Username/Email
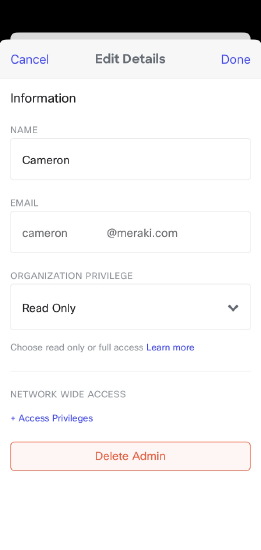
Modifying/Removing Organization-Wide Access
Under Organization > Administrators
- Click the row for the admin.
- Change their Organization Access to "None," or the desired privilege level.
- Click Update admin.
- Click Save changes.
Note: If an admin has no other network-specific access and is given "None" for organization access, they will be deleted from the list of administrators.
Deleting an Organization Admin
Under Organization > Administrators
- Click the checkbox next to the name of the admin.
- Click Delete.

- Click Save changes.
Policy and Best Practices for Organization Management
By policy, Cisco Meraki’s support team does not make dashboard configuration changes on behalf of the customer. Dashboard administrators must make their own configuration and account changes on the Meraki dashboard. Just as Cisco Meraki will not make any configuration changes, they can not make any adjustments to organization or network permissions; all changes to the dashboard administration must be made by an existing org admin on that dashboard account. Please refer to section 2.3 of our End Customer Agreement for details.
This policy is designed to protect the owners of the network from malicious intent. As such, it is strongly recommended to follow these best practices when determining org administration to ensure the security of your dashboard network:
-
Dashboard organizations should always have at least two organization admins
-
This is best practice in case one account is locked out or if access to that account's email address is lost
-
-
Be cautious in selecting an appropriate org admin, as the org admin has the highest level of control in the dashboard organization
-
The active owner of the Cisco Meraki hardware and licenses should be org admins on the account
-
-
Ensure that the username/email address of the org admin is associated with a domain under your control
-
Helps when separating relationships with previous org admins for account recovery purposes
-
Allows control of the email alias of the org admin
-
-
Use two-factor authentication and store backup authentication keys in a safe place
-
For example, Google Authenticator can be used as a two-factor auth solution with the dashboard
-
-
Consultants should be granted limited access as needed
-
Most likely, for technical configuration changes, offering temporary access as a network admin is the best option
-
If the consultant requires org admin permissions, be sure to revoke all permissions once the necessary changes have been implemented; ideally, the hardware/license owner should be the only org admin
-
-
If the current org admin is leaving the company, it is strongly recommended to revoke and/or reassign their account permissions early in the off-boarding process
-
Treat a dashboard organization administrator like a domain admin for Active Directory or the primary contact for domain name registration; only the person in this role has the ability to promote other users to this role
Managing Network Permissions
Privileges granted at the organization level will apply to all networks in an organization, and can only be managed from the Organization > Administrators page. Permissions for specific networks can be managed in two locations. Under Organization > Administrators or under Network-wide > Configure > Administration.
Adding a Network Admin
Under Organization > Administrators
- Click Add admin.
- Enter the admin's Name and Email they will use to log in.
Note: To change the admin's Name/Email after creation, see Changing a Dashboard Account's Username/Email
- (Optional) Choose a level of Organization Access, as defined in the Organization Permission Types section within this doc.
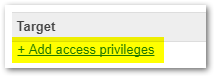
- Click Add access privileges.
- Select the network to grant access to in the Target field.
- Select the level of privilege to provide under the Access field, as defined in the Network Permission Types section of this doc.
- Click Create admin.
- Click Save changes.
- An email will be sent to the address entered with a temporary password and log-in instructions for the user.
Under Network-wide > Configure > Administration
- Select a user in Add an existing user... or click Create new user.
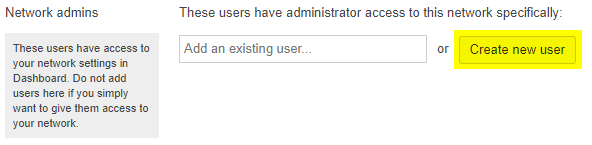
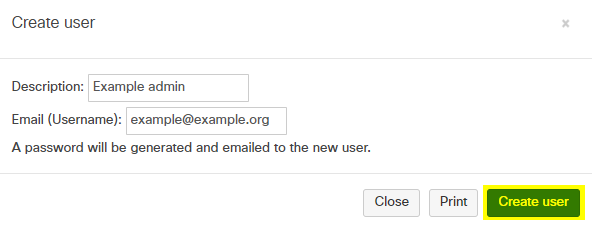
- If using Create new user, enter the admin's Name and Email they will use to log in.
- Click Create user.
- If a message indicates the user already exists, use the Add an existing user... field to search for the email address.
- Under Privileges for the new user, choose the level of network access to provide, as defined in the Network Permission Types section within this doc.

- Click Save changes.
Modifying Network Access
Under Organization > Administrators
- Click the row for the admin.
- In the row for the Target network, change the Access to the desired level.
- Click Update admin.
- Click Save changes.
Under Network-wide > Configure > Administration
- Update the Privilege drop-down for the admin user to the desired level.
- Click Save changes.
Removing Network Access
Under Organization > Administrators
- Click the row for the admin.
- Click the X in the row for the Target network.

- Click Update admin.
- Click Save changes.
Under Network-wide > Configure > Administration
- Click the X in the row for the admin user.

- Click Save changes.
Note: At present, current and past administrative users will continue to appear in the Configure > Users list when using Meraki authentication, even if no permissions are granted. Unless the user has been authorized for the SSID/VPN or has dashboard permissions, they will not have access as a result of appearing in this list.
Troubleshooting Network Permissions
Error - This email is already in use
When attempting to add a network admin by using the Create new user button, an error may appear indicating "This email is already in use," even when the user doesn't appear in the list above. This is because an account had been previously created for this email address, either on this page or elsewhere in the organization. To add the user, click in the Add an existing user box and begin entering the email address of the user. It should appear in the drop-down and can be selected. Then choose the Privileges desired and click Save changes.
Permissions by Network Tag
To simplify the assignment of network-level permissions in an organization with many networks, permissions can be granted to users for a given network tag. Those permissions will then be applied to all networks in an organization with that tag. These changes can only be made by users with full organization access.

Start by tagging any appropriate networks:
- Navigate to Organization > Overview.
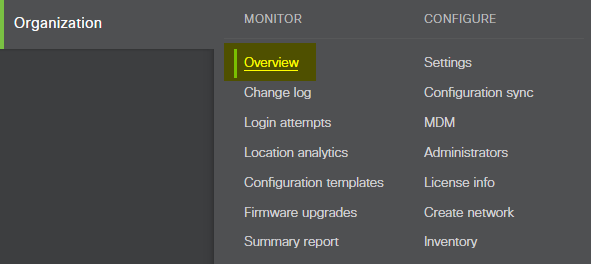
- Click the checkboxes next to the desired networks.
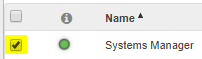
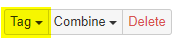
- Click Tag.
- In the Add field, select or enter any desired tags.
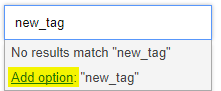
- To add a new tag, type the name of the new tag as a single word with no spaces. (e.g. "newtag" or "new_tag")
- Then click Add option next to the name of the tag desired.
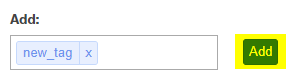
- Once the tag appears as a bubble in the Add field, click the Add button.
Then grant permissions to those networks based on the tag:
- Navigate to Organization > Administrators.
- Click the row for the admin.
- Click Add access privileges.
- Under Target, select the entry that begins with Tag and includes the name of the tag applied earlier.

- Under Access indicate the level of access this admin should have to the networks with this tag.
- Click Update admin.
- Click Save Changes.
Switch Port Management Privileges
Permissions can also be assigned at the switch port level to allow for lower-tier technicians or external contractors to make basic changes to the network, such as cycling a port. This is done by tagging individual switch ports, creating a port management privilege for the tag(s), and then granting that privilege to an administrator.
Adding Port Tags
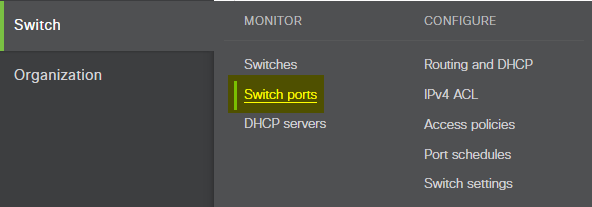
- Navigate to Configure > Switch ports.
- Click the checkbox next to any switch ports that should be tagged.
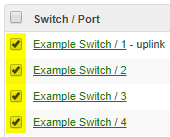
- Click Tag.

- In the Add box, select an existing tag...
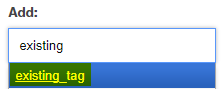
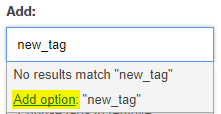
...or create a new tag by entering the name and clicking Add option.
Note: Tags cannot contain spaces.
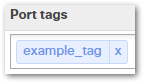
- Once any desired tags appear in the box as bubbles, click Add.
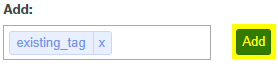
- The selected ports will now be tagged as desired.
Note: The "Tags" column may need to be added to the table using the + button on the right side of the header column.
Removing Port Tags
- Navigate to Configure > Switch ports.
- Click the checkbox next to any switch ports that should be tagged.
- Click Tag.
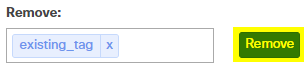
- In the Remove box, select any existing tags that should be removed.
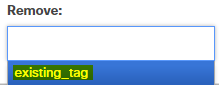
- Once any desired tags appear in the box as bubbles, click Remove.
Creating Port Management Privileges
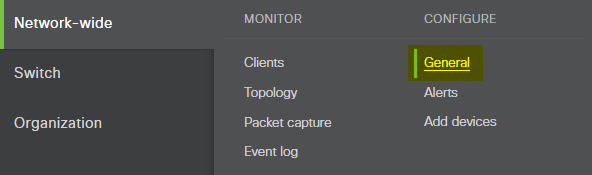
- For a combined network, navigate to Network-wide > Administration.

- For a non-combined network, navigate to Network-wide > General.

3. Under Port management privileges click Add a port management privilege.
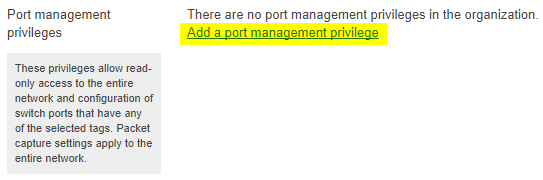
4. Enter a Privilege name that describes the purpose of the privilege.
5. Select any Port tags that the privilege provides access to.
6. Select whether Packet capture is allowed or not on these ports.
7. Click Save changes.
Note: If your switch is in a combined network, you will need to make these changes on the Network-wide > Administration page rather than the Network-wide > General page.
Removing Port Management Privileges
- Navigate to Network-wide > Configure > Administration.
- Under Port management privileges, click the X in the Actions column for the privilege to be removed.

- Click Save changes.
Assigning a Port Management Privilege
Port management privileges are assigned to network administrators the same way as other privileges described in the Managing Network Permissions section earlier in this doc. Select the privilege created earlier from the Privilege drop-down for the desired administrator.
Resending confirmation e-mail
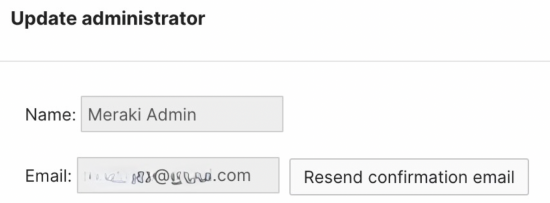
Upon creating an administrator account for a specific organization, a confirmation e-mail is sent to the address associated with that account.

In case the e-mail has not been received and the new administrator is still showing as 'Unverified', full-org admins have the option to resend the verification e-mail in Organization > Administrators > choose the account in question > Resend confirmation e-mail.
Unlocking an Administrator Account
It is possible to configure a lockout policy for accounts in a dashboard organization under Organization > Configure > Settings > Security by enabling the Account lockout option.
In the event an administrator's account has been locked as a result of too many failed authentication attempts, it can be unlocked by another user with full network permissions (for network admins) or full organization permissions. The user unlocking the account must have equivalent or greater permissions (i.e. a network-only admin cannot unlock the account for an organization-only admin).

For admin users with organization permissions:
- Navigate to Organization > Administrators.
- Click the checkbox next to the admin with the locked account.

- Click Unlock.

For admin users with network permissions:
- Navigate to Network-wide > Configure > Administration
- Click the Unlock button next to the admin with the locked account.

Resetting an Admin User's Password
In order to reset an admin user's password:
- Log out of the dashboard by clicking sign out in the upper-right corner.
- Go to https://account.meraki.com/login/reset_password.
- Enter the email address of the admin account that needs to be reset.
- Click Submit.
An email will be sent with details on how to reset the password.
Privilege Precedence
Privileges in the dashboard are additive, and a user will be granted rights on a page based on their highest level of applicable assigned permissions. Thus, an admin with read-only rights at the organization level, but full permissions for a particular network will effectively have full permissions to that network.
This is similarly applied with tags. If a user has read-only and full access to a network based on different tags, the user will be given full access.